Agentic Adventures - Using llama.cpp
Introduction
In this blog I am going to explore installing and using the llama.cpp set of tools and using them to provide local LLM models in the zed editor for agentic coding.
To test I will be using two different computers, my Apple MBP M4 Max with 36Gb of Ram (Unified) and our Lab setup which is Lenovo workstation i7-13700 with 64Gb RAM and an nVidia GeForce RTX 4080 16Gb
I will start by installing and setting up the tools, then using a few simple models will evaluate how effective this is on a simple python / PySide6 app (which is a good use case for our teaching).
The main motivation for this is to have a simple way of teaching agentic coding best practices without having to spend any extra money on tokens. This will allow simple experimentation with base / simple models before we spend actual credits on real projects.
llama.cpp install
There are very detailed instructions on installation on the GitHub page, however I used two different methods. On the mac I used brew as I typically use this day to day for other tools
brew install llama.cpp
For linux I decided to build from source as our lab machines are a more complex setup. This was fairly straight forward.
git clone git@github.com:ggml-org/llama.cpp.git
cd llama.cpp
mkdir build
cd build
cmake -G Ninja -DGGML_CUDA=ON -DCMAKE_BUILD_TYPE=Release ..
ninja
Note the flag -DGGML_CUDA=ON is used to enable the cuda version which works as our machines are already setup for cuda development.
This takes a while to build but once done there will be a build/bin folder with all the tools needed. I have now copied all the tools into our /public/devel/25-26/bin folder so they are now avaliable to all.
Zed Config
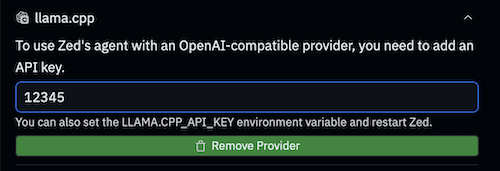
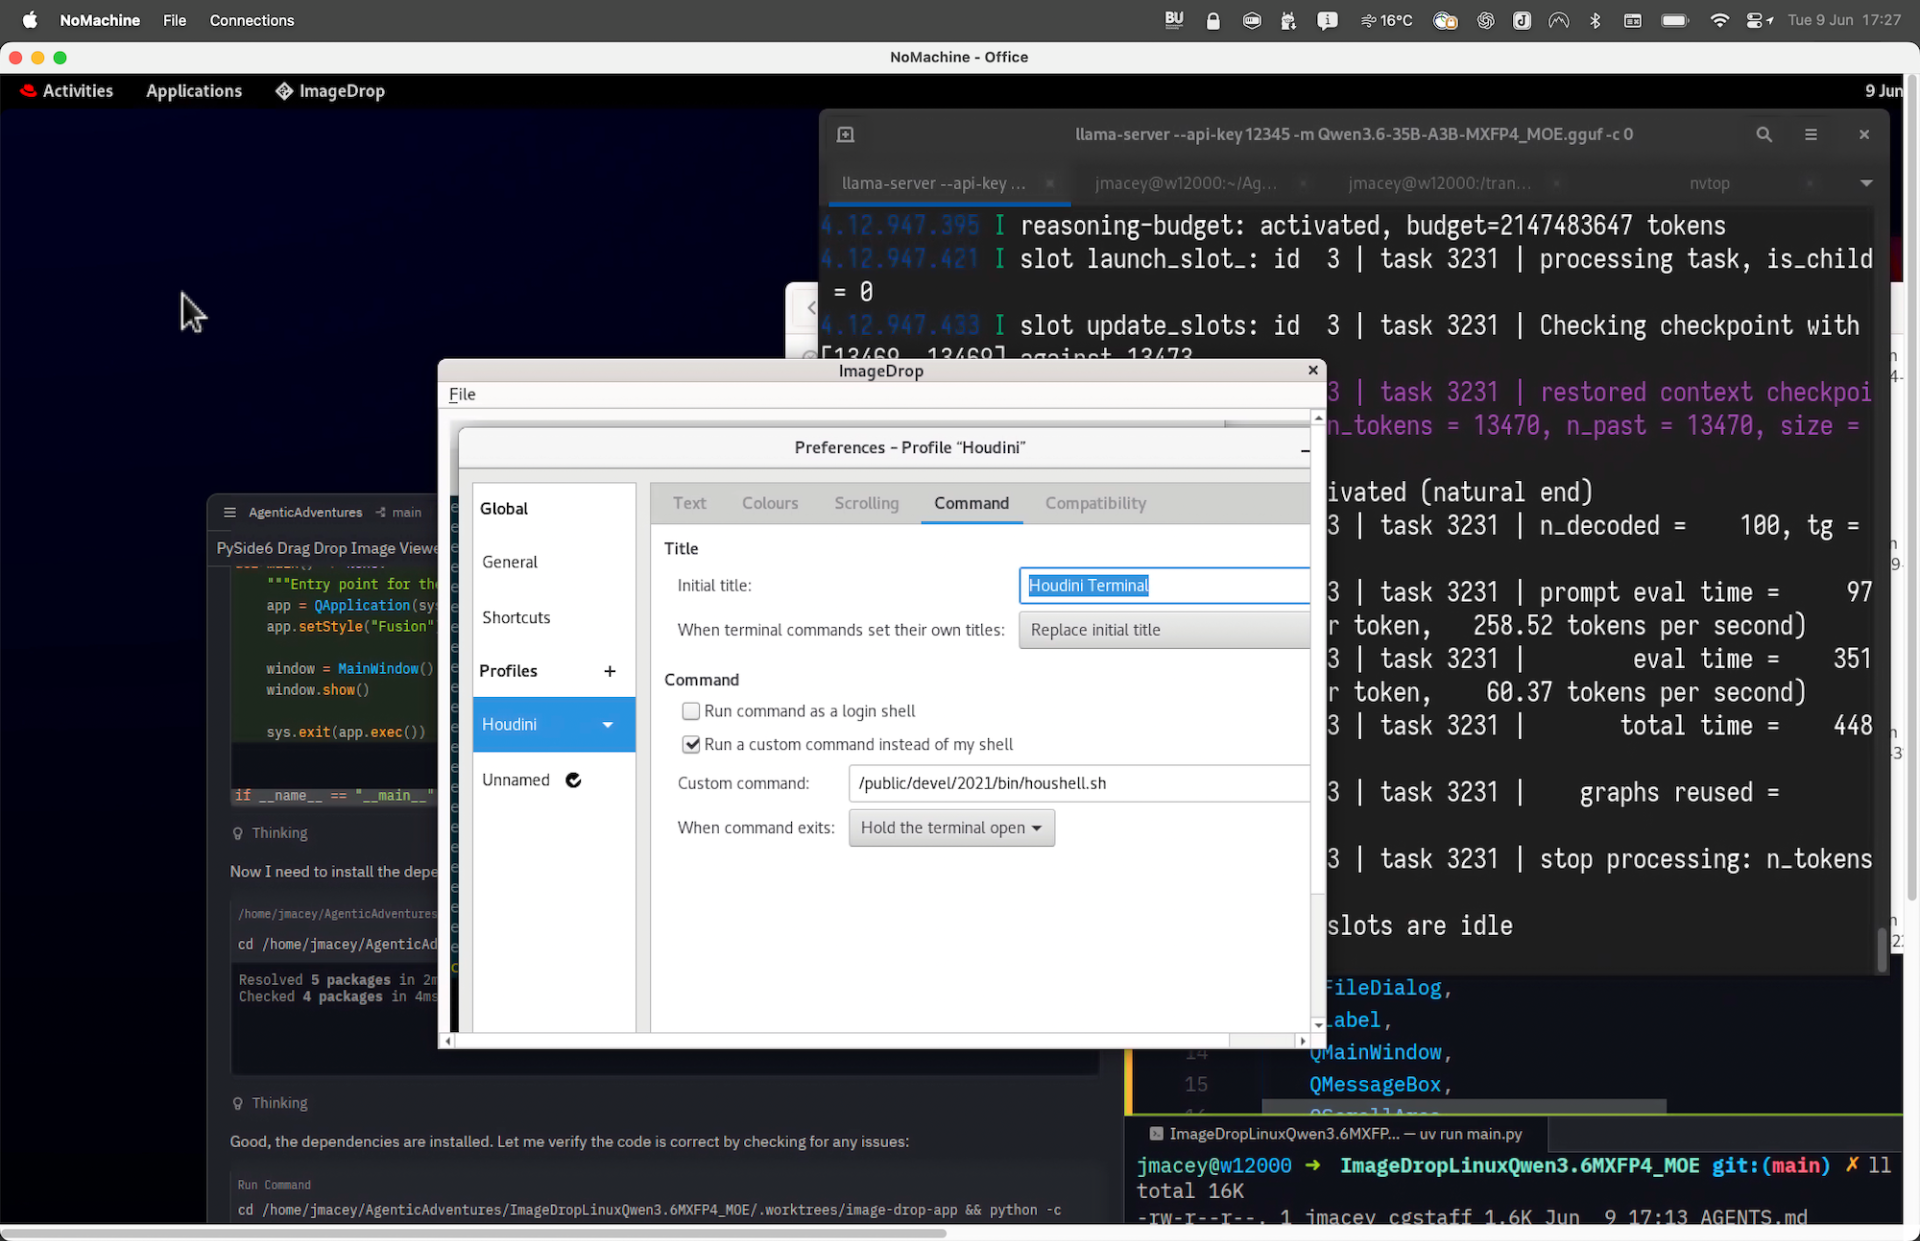
When using with zed we need to run the server and tell zed what port and API key we are using. As this is a local setup the key can be simple. To run the server we do the following in the terminal
llama-server --api-key 12345 -m MODEL.gguf
There are many other command line arguments that can be used but these are model specific and we will investigate these later.
Inside zed we now need to add the server information, llama.cpp uses openai compatible api so it will work directly with the zed agent panel as a provider.
We need to add the following into the zed config.json file (zed->settings->settings file)
"language_models": {
    "openai_compatible": {
      "llama.cpp": {
        "api_url": "http://localhost:8080",
        "available_models": [
          {
            "name": "LLamaServerCurrentModel",
            "display_name": "LLamaServerCurrentModel",
            "max_tokens": 131072,
            "max_output_tokens": 65536,
          },
        ],
      },
    },
  },
The core element is the url / port that the server is running on, by defaul llama.cpp will use http://localhost:8080 but other ports can be used / configured on the server command line.
The name / display_name will appear in the zed agent panel.
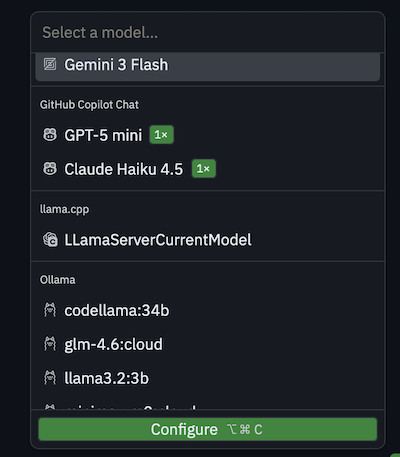
Select the LLamaServerCurrentModel and hit configure and enter the same API key passed on the command line
The tools is now ready to use.
Test project
To test the different local modes I am going to use the same prompt and AGENTS.md file but try different models on both my mac and linux setup. I will add all the results and chats to a github repo so I can have a look at the results and store the agent conversations as per the ncca coding standard.
Project Prompt
The following prompt will be used to tell the agent what to do.
Using PySide6 create a simple MainWindow application in the file main.py that allows the user to drop and image or load via a file dialog and display it in the main window central widget. If a image is added it will be added to the centeral widget with the other images.
AGENTS.md file
The AGENTS.md file is used to give a set of rules for the the basic python setup and development.
# Global Agent Rules
## Git Workflow
When making code changes ALWAYS follow this process:

1. Ensure current branch is committed if not do not continue until the user has committed and pushed the changes.

2. Create a new worktree before editing:
   git worktree add .worktrees/<short-task-name> -b agent/<short-task-name>

3. Never commit directly to main or master.

4. Use conventional commit messages

## Development Context

You are an expert in Python programming and related Python technologies such as uv.
You understand modern Python development practices, architectural patterns, and the importance of providing complete context in code generation.

### General Principles
- **PEP 8 compliance**: Follow standard Python style guide
- **Type hints**: Required for all function signatures and class attributes
- **Docstrings**: Google-style docstrings for all public classes and methods
- **Import sorting**: Automatic with ruff (`--select I --fix`)
- **Line length**: Default ruff settings (88 characters)

### Script Execution
Always use uv shebang for executable scripts:

#!/usr/bin/env -S uv run --script

### Package Management
- **Primary tool**: UV (modern Python package manager)
- **Lock file**: uv.lock for reproducible builds
- **Build system**: uv_build backend
- **Python version**: Requires Python 3.13+

### Documentation
- **Docstring style**: Google format with Args, Returns, Raises sections
- **API docs**: Generated automatically via mkdocstrings
- **Examples**: Include usage examples in docstrings
- **Type hints**: Essential for documentation generation
Base Project
For each base project I will use uv to create a new project, I will use the format ImageDrop[Machine]-[model] where Machine will be either Mac or Linux and Model will be the base name of the model.
For example for the first test I will use Qwopus3.5-9B-coder-Exp-BF16.gguf so the command line to setup the mac project will be
uv init ImageDropMacQwopus3.5
cd ImageDropMacQwopus3.5
uv add pyside6
cp ../AGENTS.md ./
starting the server
We need to download models to use with llama.cpp it uses a format called gguf , we can either download models in the format to our local drives or get llama.cpp to do it for us from huggingface. Things we need to remember is that we are limited by the size of the RAM on our devices to the models we can use. Despite having 64 Gb on the desktop machine, the Mac actually has more power than the desktop as the nVidia GPU only has 16Gb but the Mac has unified memory of 36Gb shared between CPU / GPU (however this can slow other tasks down and sometime make a reboot needed!).
To start a server and download a model from hugging face we can do the following
- search for the model we need
- copy the model url from hugging face (or other sites)
- run model using the -hf flag
For example if we search for “Qwopus3.6 gguf” we can get the following page on Hugging face
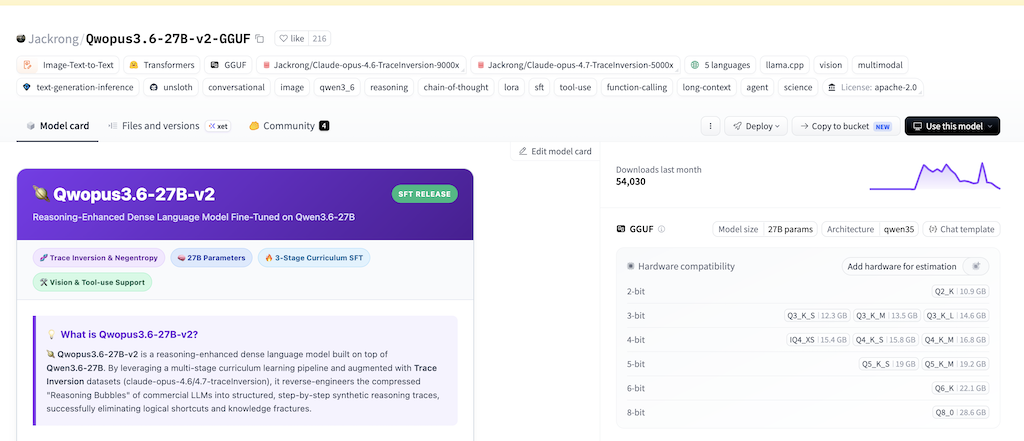
The button next to the title will copy the url needed for download and using the command
llama-cli -hf Jackrong/Qwopus3.6-27B-v2-MTP-GGUF
Will download the model that fits the GPU size into the local folder ~/.cache/huggingface/hub which on the lab setup is on a server which will have issues with speed. I have the following export HF_HOME=/transfer/huggingface in my .zshrc to download to the local drive (however this will not work if you change machines).
Problems
Whilst this worked fine on the linux machine, when trying this on my mac it had major issues with ram (even tho the model should fit), I ended up having to re-boot the mac several times trying this and ended up using a smaller model, https://huggingface.co/unsloth/Qwen3.6-35B-A3B-GGUF which seems to work very well on both machines despite the 21.7Gb size (I think due to being a MoE model).
Test1 Mac Qwen3.6MXFP4_MOE
To start the project i did the following
uv init ImageDropMacQwen3.6MXFP4_MOE
cd  ImageDropMacQwen3.6MXFP4_MOE
cp ../AGENTS.md ./
zed .
llama-server --api-key 12345 -m ~/teaching/AI_Models/Qwen3.6-35B-A3B-MXFP4_MOE.gguf # note chose your own model location
I then open the agent panel in zed and chose the LlamaServerCurrentModel and pasted in the prompt.
First thing I noticed was it opened up the AGENTS.md file and used that which was really promising. However it got a little confused as the project wasn’t yet commited or added to the repo (forgot to do this!).
Wow it seems to work first time! However it has ignored the git rules of using a worktree etc.
Well not quite, the app runs and it allows the image to drop but there seems to be an issue with the display of the image. Lets see if the agent can fix it. From experience I have found that as we only have limited memory it is usually best to start a new chat when trying to add features etc (on bigger paid models we can do far more). So I will start a new thread and see if I can fix things, I have yet to actually look at the code created.
The next prompt I used was
in @main.cpp When loading the image the image seems to get scaled to a very small size and becomes fuzzy.
It thought about it for a bit and decided
I can see the issue. Looking at the `ImageLabel` class (in `main.py`), there are two problems:

1. **`setScaledContents(True)`** (line 58) conflicts with the manual scaling in `resizeEvent` — `setScaledContents` scales the pixmap to fill the label's entire geometry, but then `resizeEvent` also scales it, creating double-scaling artifacts.

2. **`resizeEvent` always scales** the pixmap to `self.size()` regardless of whether the image is larger or smaller than the label. This means even small images get scaled to whatever size the label happens to be, causing fuzziness.

The fix:
- Remove `setScaledContents(True)` — let `resizeEvent` handle all scaling
- Only scale **down** when the image is larger than the label (never scale up)
Which resulted in the following app.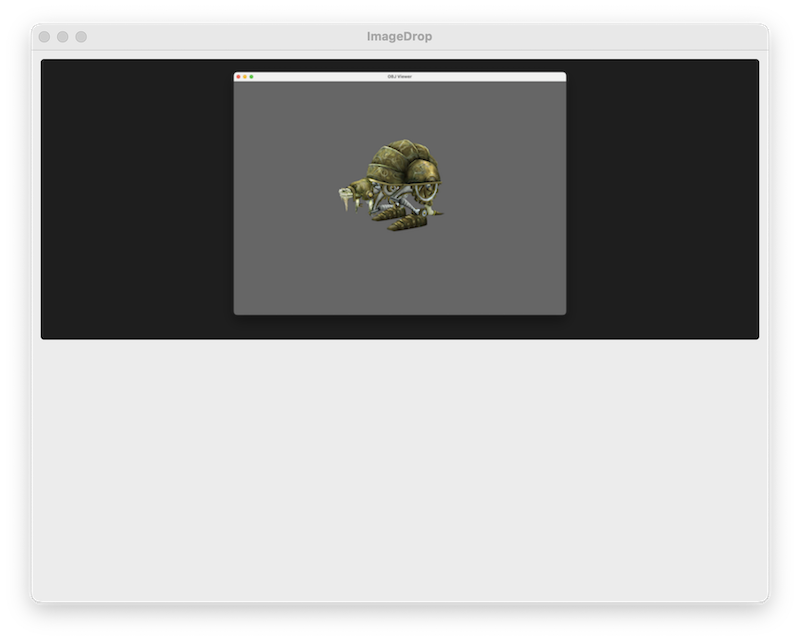
That sort of works, however when I tried to add a 2nd image I get the following error.
uv run main.py
Error calling Python override of QWidget::dropEvent(): Traceback (most recent call last):
  File "/Volumes/teaching/Code/AgenticAdventures/ImageDropMacQwen3.6MXFP4_MOE/main.py", line 184, in dropEvent
    self.add_image(path)
    ~~~~~~~~~~~~~~^^^^^^
  File "/Volumes/teaching/Code/AgenticAdventures/ImageDropMacQwen3.6MXFP4_MOE/main.py", line 145, in add_image
    self._remove_hint_if_needed()
    ~~~~~~~~~~~~~~~~~~~~~~~~~~~^^
  File "/Volumes/teaching/Code/AgenticAdventures/ImageDropMacQwen3.6MXFP4_MOE/main.py", line 112, in _remove_hint_if_needed
    if self._hint_label.isVisible():
       ~~~~~~~~~~~~~~~~~~~~~~~~~~^^
RuntimeError: libshiboken: Internal C++ object (PySide6.QtWidgets.QLabel) already deleted.
➜  ImageDropMacQwen3.6MXFP4_MOE git:(main) ✗
I dumped this into the previous prompt to see how well it would cope.
It responded with
The issue is clear: when multiple files are dropped at once, `dropEvent` calls `add_image()` for each file. On the first call, `_remove_hint_if_needed()` calls `deleteLater()` on the hint label. On the second call, it tries to call `isVisible()` on the already-deleted C++ object, causing a RuntimeError.

The fix is to track whether the hint has already been removed with a boolean flag:
Again fixing it in one go (but not an ideal behaviour) which was more than I expected. I think this model it actually quite good.
Test 2 Linux Qwen3.6MXFP4_MOE
I’ve used the exact same setup for the linux test. On first run It failed due to the text being sent being over the context size.
E srv send_error: task id = 3975, error: request (7816 tokens) exceeds the available context size (4096 tokens), try increasing it
I re-ran using the -c 0 flag
llama-server --api-key 12345 -c 0 -m /transfer/AI_Models/Qwen3.6-35B-A3B-MXFP4_MOE.gguf
This tells the model to use max context avaliable and allowed it to work.
Again the linux version worked first time (as shown in the image) however the drag and drop didn’t work. More interestingly I didn’t have any of the issues with image re-sizing or fuzzyness!
Another interesting thing that happened is that it worked in main.py ignoring the rules on using a git worktree, however on testing it discovered it had done this, reverted back main and started working in a worktree instead!
It also did far better tool calling (ruff etc) than under the mac, I need to check why this is the case. I finally told it to merge the worktree to main and commit. I’ve saved the agent chat in the repos here
The next thing to do is to fix the drag and drop not working. I decided to keep the same chat context and add more
When dragging an image into the app nothing happens, the image just returns to the file manager. It loads fine from the file menu
It managed to fix this and the app works as expected (see AgentChat2.md for full details )
Qwen3.6MXFP4_MOE Analysis
Both models were comparitivly quick and took a few minutes to generate the initial program, and the extra fixes were also quite quick.
In genral the code is very different, however there are some similarities.
- Drag-and-drop support for image files
- A File > Open menu with Ctrl+O shortcut
- A MainWindow with an 800×600 default size
- Fusion style applied via app.setStyle(“Fusion”)
- A placeholder/hint label that guides the user before any images are loaded
- Vertical stacking of loaded images
Key Differences
The mac version includes a proper uv inline script header declaring Python ≥3.14 and pyside6>=6.8 as dependencies, making it self-contained and directly runnable. The linux version only has the shebang line without dependency declarations.
| Aspect | Linux | Mac |
|---|---|---|
| Drop handling | Separate DropZone class + ImageContainer | Single ImageDropWidget handles both |
| Image display | Plain QLabel | Dedicated ImageLabel subclass |
| Scroll support | QScrollArea wrapping the container | No scroll area — images just stack |
Linux’s ImageLabel implements resizeEvent to dynamically scale images to fit the viewport while preserving aspect ratio. Mac displays images at their native resolution with no scaling.
Linux has an explicit dark theme (#1a1a2e background, #1e1e1e per-image borders). Mac is unstyled beyond basic transparency.
Mac uses getOpenFileName (single file). Linux uses getOpenFileNames (multiple files at once).
Mac has a broader list including .pnm, .qhdr, .rgb, .rgbe, .tga. Linux covers only the common web formats.
Mac has a Clear All action (Ctrl+Shift+C). Linux omits this entirely.
Linux is more idiomatic — better docstrings, from future import annotations, a typed main() -> int return value, and cleaner separation of concerns overall.
However the Linux version is more pleasing and useful overall.
But why did this happen.
The differences almost certainly come down to inference non-determinism rather than anything in the model or prompt itself.
Even at low temperatures, MoE (Mixture of Experts) models are particularly sensitive to sampling randomness (temperature). Each token is sampled probabilistically, once an early architectural decision diverges (e.g. “I’ll create a DropZone class” vs “I’ll create an ImageDropWidget”), the entire subsequent generation follows a different path. Small differences compound rapidly.
MoE architectures route tokens through different expert subnetworks, and that routing can differ based on:
- Floating point rounding differences between the two machines’ CPUs/hardware
- Memory layout and NUMA topology affecting computation order
- The MXFP4 quantisation amplifying these tiny numerical gaps
Compounding this llama.cpp uses AVX2 on the Linux box for SIMD operations and Neon on the mac. Even with identical weights, different SIMD instruction sets produce subtly different floating point results, which shifts the probability distributions at each token.
It is most likely that divergence happened very early in the run, likely in the first 50 or so tokens, before any code was written. Once the model “decided” on a structural approach in its reasoning, everything else followed coherently from that fork.
To be Continued
This has taken quite a while to complete and I have decided to continue this in another post and look at some more models and what it can produce. The GitHub repo can be found at https://github.com/NCCA/AgenticAdventures